Laravel Login with Email or Username: Demo Project [+Github Repo]
 Povilas Korop
Founder of QuickAdminPanel
We are starting to invest more into demo-projects of how to customize stuff in Laravel. In this small lesson – how to add username field to users table, and allow users to login with username.
We will go a few steps further and also add these features:
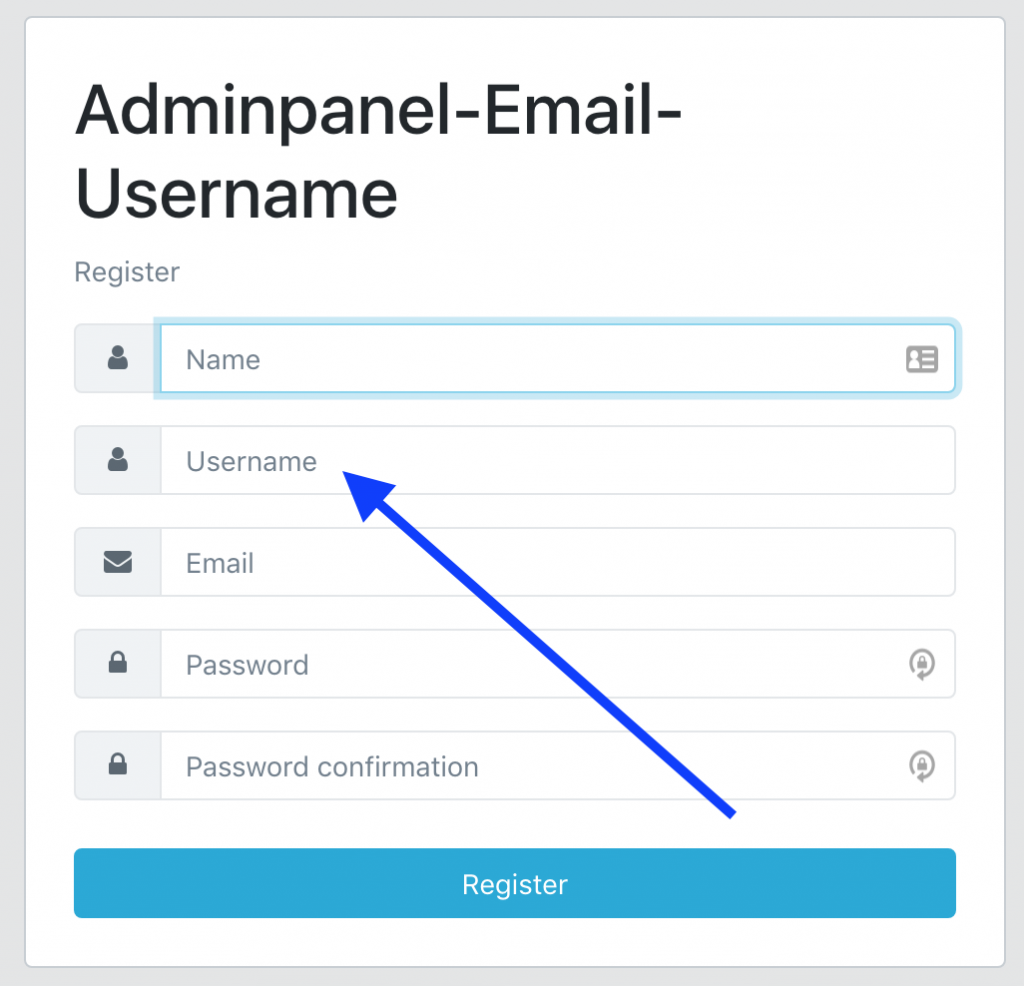
- Register with entering email and username, both required
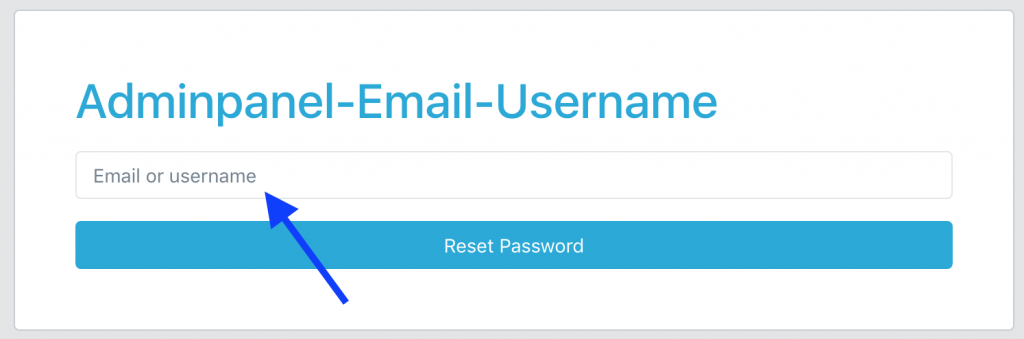
- Reset password by entering username or email
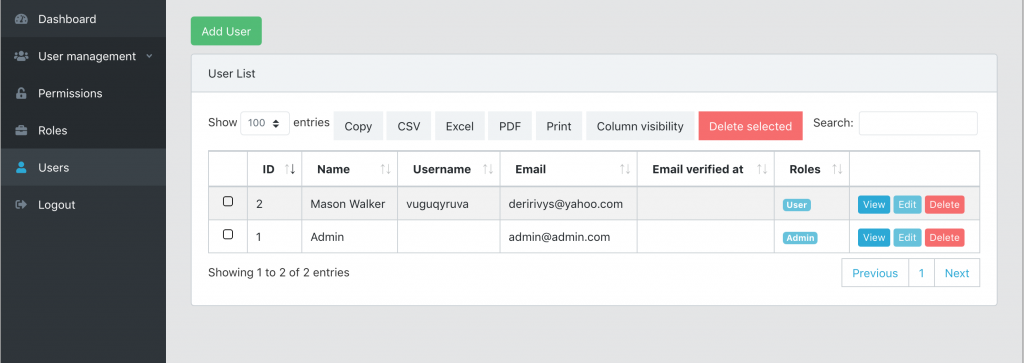
- As part of adminpanel’s User Management, admins will be able to add/edit that Username field
Step 1. Default QuickAdminPanel on CoreUI Theme
Our QuickAdminPanel generator helps with demo-projects, as it generates the core adminpanel, and then we can write custom code.
Notice: our demo-project will be based on QuickAdminPanel, but it’s not necessary. You can follow the same tutorial and start from default Laravel Auth.
In this case, we generate adminpanel based on CoreUI adminpanel theme, and the only module we need to install for this demo is User Registration.
In the repository, here’s the first commit from that generated code, it was all automatic, without any manual coding.
Step 2. Add username field to registration
Now we need to make this form working:
First, we need to add users.username field into migration:
public function up()
{
    Schema::table('users', function (Blueprint $table) {
        $table->string('username')->nullable();
    });
}
Next, add it to $fillable array in app/User.php model:
class User extends Authenticatable
{

    // ...

    protected $fillable = [
        'name',
        'email',
        'password',
        'created_at',
        'updated_at',
        'deleted_at',
        'remember_token',
        'email_verified_at',
        'username',
    ];
Next, register form located in resources/views/auth/register.blade.php – we just add one new “div” block:
...
</div>

<div class="input-group mb-3">
    <div class="input-group-prepend">
        <span class="input-group-text">
            <i class="fa fa-user fa-fw"></i>
        </span>
    </div>
    <input type="text" name="username"
    	class="form-control{{ $errors->has('username') ? ' is-invalid' : '' }}" r
    	equired placeholder="{{ trans('global.login_username') }}"
    	value="{{ old('username', null) }}">
    @if($errors->has('username'))
        <div class="invalid-feedback">
            {{ $errors->first('username') }}
        </div>
    @endif
</div>

<div class="input-group mb-3">
...
Finally, in this step we need to save the username – in app/Http/Controllers/Auth/RegisterController.php, we add this field in both validation and creating the user:
class RegisterController extends Controller
{
    protected function validator(array $data)
    {
        return Validator::make($data, [
            'name' => ['required', 'string', 'max:255'],
            'username' => ['required', 'string', 'max:255'],
            'email' => ['required', 'string', 'email', 'max:255', 'unique:users'],
            'password' => ['required', 'string', 'min:8', 'confirmed'],
        ]);
    }

    protected function create(array $data)
    {
        return User::create([
            'name' => $data['name'],
            'username' => $data['username'],
            'email' => $data['email'],
            'password' => Hash::make($data['password']),
        ]);
    }
}
Full commit of this step with some additional files can be found here on Github.
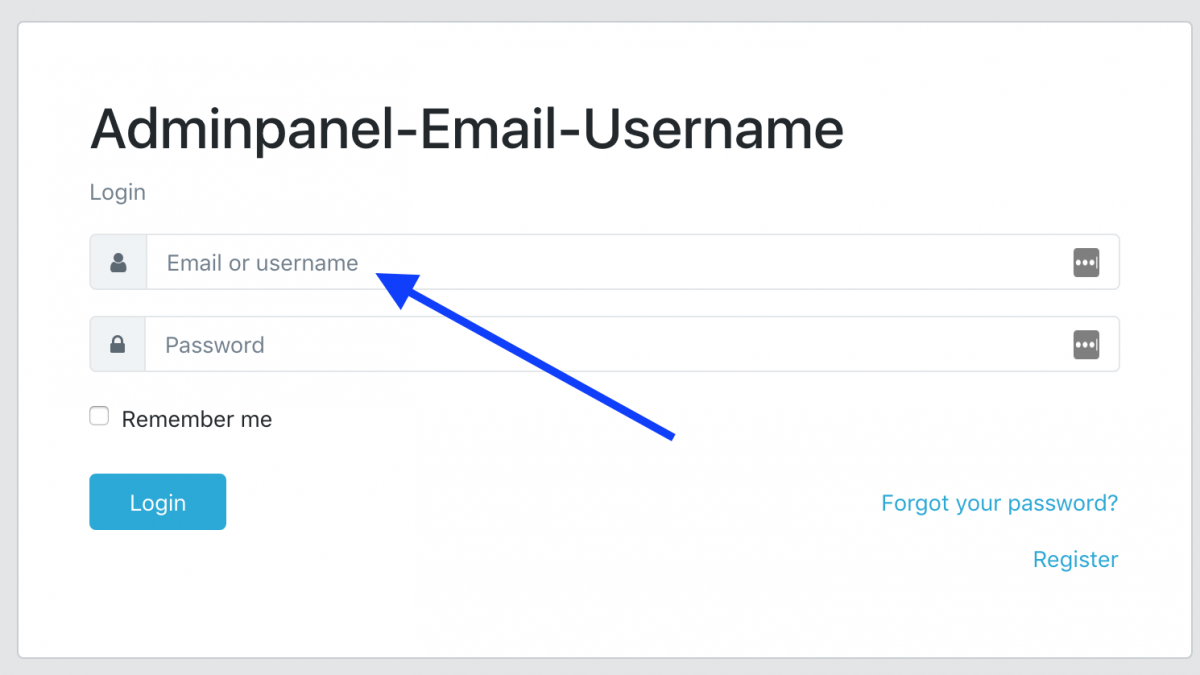
Step 3. Login with email or username
Now, let’s get to login form. The only thing we need to do in the form at resources/views/auth/login.blade.php is change email field placeholder from “Email” to “Email or username”, and also change the type from input type=”email” to input type=”text”:

And we need to change the email check logic in app/Http/Controllers/Auth/LoginController.php. For that, we add new method credentials(), which originall comes from AuthenticatesUsers trait in core Laravel, we just override it in our Controller:
/**
 * Get the needed authorization credentials from the request.
 *
 * @param  \Illuminate\Http\Request  $request
 * @return array
 */
protected function credentials(Request $request)
{
    $field = filter_var($request->get($this->username()), FILTER_VALIDATE_EMAIL)
        ? $this->username()
        : 'username';
    return [
        $field => $request->get($this->username()),
        'password' => $request->password,
    ];
}
May look pretty unclear, but the logic is this: if passed email variable is an actual email address, then we check the “email” field as credential. Otherwise it will be “username” field.
That’s it, login done! Code of this commit is here.
Step 4. Reset Password by Username
Final step is to allow users to enter username in password reset form.
This one is really similar to the previous step.
Again, in the views we need to change input type=”email” to input type=”text” in two files:
– resources/views/auth/passwords/email.blade.php
– resources/views/auth/passwords/reset.blade.php
And also we need to override the field name logic in app/Http/Controllers/Auth/ForgotPasswordController.php:
/**
 * Get the needed authentication credentials from the request.
 *
 * @param  \Illuminate\Http\Request  $request
 * @return array
 */
protected function credentials(Request $request)
{
    $field = filter_var($request->get('email'), FILTER_VALIDATE_EMAIL)
        ? 'email'
        : 'username';
    return [
        $field => $request->get('email')
    ];
}
And that’s it – user will be found by username, and still get email to the users.email address.
Commit code: click here
So that’s it, our full demo project can be found in this repository.
Try our QuickAdminPanel generator!